听说 TCC 不支持 OpenFeign?这个坑松哥必须给大家填了!
友情提示:本文略长略复杂,但是有配套的视频教程。
在前面的文章中,松哥和大家聊了分布式事务框架 seata 的 at 模式,然后有小伙伴评论说 seata 的 tcc 模式不支持 Spring Boot:
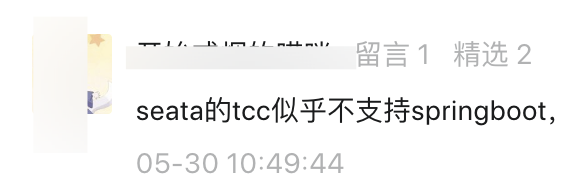
这。。。必然是支持的呀!
我一直觉得网上讲分布式事务的理论很多,案例代码很少,所以咱们今天就整一个例子,一起来把这个捋一捋。
1. 什么是 TCC 模式
相比于上篇文章所聊的 AT 模式,TCC(Try-Confirm-Cancel) 模式就带一点手动的感觉了,它也是两阶段提交的演化,但是和 AT 又不太一样,我们来看下流程。
官网上有一张 TCC 的流程图,我们来看下:

可以看到,TCC 也是分为两阶段:
- 第一阶段是 prepare,在这个阶段主要是做资源的检测和预留工作,例如银行转账,这个阶段就先去检查下用户的钱够不够,不够就直接抛异常,够就先给冻结上。
- 第二阶段是 commit 或 rollback,这个主要是等各个分支事务的一阶段都执行完毕,都执行完毕后各自将自己的情况报告给 TC,TC 一统计,发现各个分支事务都没有异常,那么就通知大家一起提交;如果 TC 发现有分支事务发生异常了,那么就通知大家回滚。
那么小伙伴可能也发现了,上面这个流程中,一共涉及到了三个方法,prepare、commit 以及 rollback,这三个方法都完全是用户自定义的方法,都是需要我们自己来实现的,所以我一开始就说 TCC 是一种手动的模式。
和 AT 相比,大家发现 TCC 这种模式其实是不依赖于底层数据库的事务支持的,也就是说,哪怕你底层数据库不支持事务也没关系,反正 prepare、commit 以及 rollback 三个方法都是开发者自己写的,我们自己将这三个方法对应的流程捋顺就行了。
在上篇文章的中,我们讲 AT 模式,每个数据库都需要有一个 undo log 表,这个表用来记录一条数据更改之前和更改之后的状态(前镜像和后镜像),如果所有分支事务最终都提交成功,那么记录在 undo log 表中的数据就会自动删除;如果有一个分支事务执行失败,导致所有事务都需要回滚,那么就会以 undo log 表中的数据会依据,生成反向补偿语句,利用反向补偿语句将数据复原,执行完成后也会删除 undo log 表中的记录。
在这个流程中,大家看到,undo log 表扮演了非常重要的角色。TCC 和 AT 最大的区别在于,TCC 中的提交和回滚逻辑都是开发者自己写的,而 AT 都是框架自动完成的。
为了方便大家理解,本文我就不重新搞案例了,咱们还用上篇文章那个下订单的案例来演示。
2. 案例回顾
这是一个商品下单的案例,一共有五个服务,我来和大家稍微解释下:
- eureka:这是服务注册中心。
- account:这是账户服务,可以查询/修改用户的账户信息(主要是账户余额)。
- order:这是订单服务,可以下订单。
- storage:这是一个仓储服务,可以查询/修改商品的库存数量。
- bussiness:这是业务,用户下单操作将在这里完成。
这个案例讲了一个什么事呢?
当用户想要下单的时候,调用了 bussiness 中的接口,bussiness 中的接口又调用了它自己的 service,在 service 中,首先开启了全局分布式事务,然后通过 feign 调用 storage 中的接口去扣库存,然后再通过 feign 调用 order 中的接口去创建订单(order 在创建订单的时候,不仅会创建订单,还会扣除用户账户的余额),在这个过程中,如果有任何一个环节出错了(余额不足、库存不足等导致的问题),就会触发整体的事务回滚。
本案例具体架构如下图:
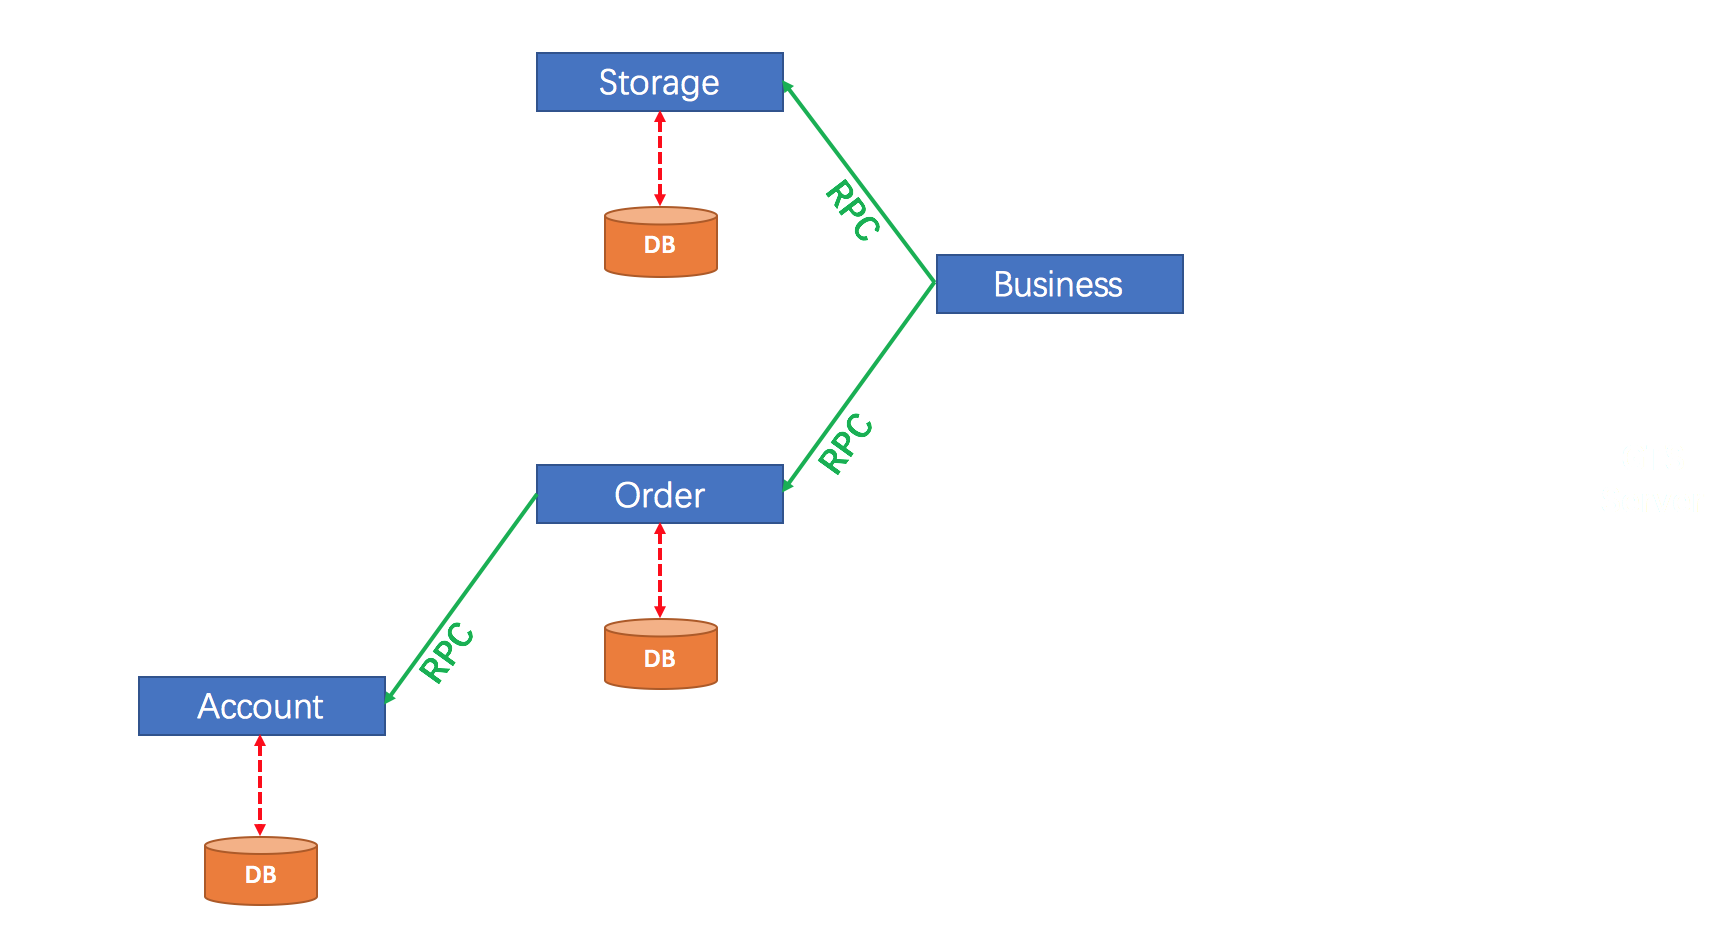
这个案例就是一个典型的分布式事务问题,storage、order 以及 account 中的事务分属于不同的微服务,但是我们希望他们同时成功或者同时失败。
这个案例的基本架构我这里就不重复搭建了,小伙伴们可以参考上篇文章,这里我们主要来看 TCC 事务如何添加进来。
3. 重新设计数据库
首先我们将上篇文章中的数据库来重新设计一下,方便我们本文的使用。
账户表增加一个冻结金额的字段,如下:

订单表和前文保持一致,不变。
库存表也增加一个冻结库存数量的字段,如下:

另外,由于我们这里不再使用 AT 模式,所以可以删除之前的 undo_log 表了(可能有小伙伴删除 undo_log 表之后,会报错,那是因为你 TCC 模式使用不对,注意看松哥后面的讲解哦)。
相关的数据库脚本小伙伴们可以在文末下载,这里我就不列出来了。
4. 重新设计 Feign 接口
在 TCC 模式中,我们的 Feign 换一种方式来配置。
小伙伴们都知道,在上篇文章的案例中,我们有一个 common 模块,用来存放一些公共内容(实际上我们只是存储了 RespBean),现在我们把这里涉及到的 OpenFeign 接口也存储进来,一共是三个 OpenFeign 接口,因为还要用到 seata 中的注解,所以我们在 common 中引入 OpenFeign 和 seata 的依赖,如下:
<dependency>
    <groupid>com.alibaba.cloud</groupid>
    <artifactid>spring-cloud-starter-alibaba-seata</artifactid>
    <version>2.2.2.RELEASE</version>
</dependency>
<dependency>
    <groupid>org.springframework.cloud</groupid>
    <artifactid>spring-cloud-starter-openfeign</artifactid>
    <version>2.2.6.RELEASE</version>
</dependency>
然后在这里定义 OpenFeign 的三个接口,如下:
@LocalTCC
public interface AccountServiceApi {
    @PostMapping("/account/deduct/prepare")
    @TwoPhaseBusinessAction(name = "accountServiceApi", commitMethod = "commit", rollbackMethod = "rollback")
    boolean prepare(@RequestBody BusinessActionContext actionContext, @RequestParam("userId") @BusinessActionContextParameter(paramName = "userId") String userId, @RequestParam("money") @BusinessActionContextParameter(paramName = "money") Double money);

    @RequestMapping("/account/deduct/commit")
    boolean commit(@RequestBody BusinessActionContext actionContext);

    @RequestMapping("/account/deduct/rollback")
    boolean rollback(@RequestBody BusinessActionContext actionContext);
}
@LocalTCC
public interface OrderServiceApi {
    @PostMapping("/order/create/prepare")
    @TwoPhaseBusinessAction(name = "orderServiceApi", commitMethod = "commit", rollbackMethod = "rollback")
    boolean prepare(@RequestBody BusinessActionContext actionContext, @RequestParam("userId") @BusinessActionContextParameter(paramName = "userId") String userId, @RequestParam("productId") @BusinessActionContextParameter(paramName = "productId") String productId, @RequestParam("count") @BusinessActionContextParameter(paramName = "count") Integer count);

    @RequestMapping("/order/create/commit")
    boolean commit(@RequestBody BusinessActionContext actionContext);

    @RequestMapping("/order/create/rollback")
    boolean rollback(@RequestBody BusinessActionContext actionContext);
}
@LocalTCC
public interface StorageServiceApi {
    @PostMapping("/storage/deduct/prepare")
    @TwoPhaseBusinessAction(name = "storageServiceApi",commitMethod = "commit",rollbackMethod = "rollback")
    boolean deduct(@RequestBody BusinessActionContext actionContext, @RequestParam("productId")@BusinessActionContextParameter(paramName = "productId") String productId, @RequestParam("count") @BusinessActionContextParameter(paramName = "count") Integer count);

    @RequestMapping("/storage/deduct/commit")
    boolean commit(@RequestBody BusinessActionContext actionContext);

    @RequestMapping("/storage/deduct/rollback")
    boolean rollback(@RequestBody BusinessActionContext actionContext);
}
这里一共有三个接口,但是只要大家搞懂其中一个,另外两个都很好懂了。我这里就以 AccountServiceApi 为例来和大家讲解吧。
- 首先接口的定义上,需要加一个注解 @LocalTCC,这个表示开启 seata 中的 TCC 模式。
- 然后就是 @TwoPhaseBusinessAction 注解,两阶段提交的注解,这个注解有三个属性,第一个 name 就是处理两阶段提交的 bean 的名字,其实就是当前 bean 的名字,当前类名首字母小写。两阶段第一阶段就是 prepare 阶段,也就是执行 @TwoPhaseBusinessAction 注解所在的方法,第二阶段则分为两种情况,提交或者回滚,分别对应了两个不同的方法,commitMethod 和 rollbackMethod 就指明了相应的方法。
- 一阶段的 prepare 需要开发者手动调用,二阶段的 commit 或者 rollback 则是系统自动调用。prepare 中的方法是由开发者来传递的,而在二阶段的方法中,相关的参数我们需要从 BusinessActionContext 中获取,@BusinessActionContextParameter 注解就是将对应的参数放入到 BusinessActionContext 中(注意需要给每一个参数取一个名字),将来可以从 BusinessActionContext 中取出对应的参数。
- 另外需要注意,接口的返回值设计成 boolean,用以表示相应的操作执行成功还是失败,返回 false 表示执行失败,默认会有重试机制进行重试。
这是 AccountServiceApi,另外两个接口的设计也是大同小异,这里我就不再赘述。
接下来看接口的实现。
5. Account
首先我们来看看 Account 服务。AccountController 实现 AccountServiceApi。
我们来看下 AccountController 的定义:
@RestController
public class AccountController implements AccountServiceApi {
    @Autowired
    AccountService accountService;

    @Override
    public boolean prepare(BusinessActionContext actionContext, String userId, Double money) {
        return accountService.prepareDeduct(userId, money);
    }

    @Override
    public boolean commit(BusinessActionContext actionContext) {
        return accountService.commitDeduct(actionContext);
    }

    @Override
    public boolean rollback(BusinessActionContext actionContext) {
        return accountService.rollbackDeduct(actionContext);
    }
}
因为接口的路径都定义在 AccountServiceApi 中了,所以这里只需要简单实现即可,核心的处理逻辑在 AccountService 中,我们来看下 AccountService:
@Service
public class AccountService {

    private static final Logger logger = LoggerFactory.getLogger(AccountService.class);

    @Autowired
    AccountMapper accountMapper;

    /**
     * 预扣款阶段
     * 检查账户余额
     *
     * @param userId
     * @param money
     * @return
     */
    @Transactional(rollbackFor = Exception.class)
    public boolean prepareDeduct(String userId, Double money) {
        Account account = accountMapper.getAccountByUserId(userId);
        if (account == null) {
            throw new RuntimeException("账户不存在");
        }
        if (account.getMoney() < money) {
            throw new RuntimeException("余额不足,预扣款失败");
        }
        account.setFreezeMoney(account.getFreezeMoney() + money);
        account.setMoney(account.getMoney() - money);
        Integer i = accountMapper.updateAccount(account);
        logger.info("{} 账户预扣款 {} 元", userId, money);
        return i == 1;
    }

    /**
     * 实际扣款阶段
     *
     * @param actionContext
     * @return
     */
    @Transactional(rollbackFor = Exception.class)
    public boolean commitDeduct(BusinessActionContext actionContext) {
        String userId = (String) actionContext.getActionContext("userId");
        Double money = ((BigDecimal) actionContext.getActionContext("money")).doubleValue();
        Account account = accountMapper.getAccountByUserId(userId);
        if (account.getFreezeMoney() < money) {
            throw new RuntimeException("余额不足,扣款失败");
        }
        account.setFreezeMoney(account.getFreezeMoney() - money);
        Integer i = accountMapper.updateAccount(account);
        logger.info("{} 账户扣款 {} 元", userId, money);
        return i == 1;
    }

    /**
     * 账户回滚阶段
     *
     * @param actionContext
     * @return
     */
    @Transactional(rollbackFor = Exception.class)
    public boolean rollbackDeduct(BusinessActionContext actionContext) {
        String userId = (String) actionContext.getActionContext("userId");
        Double money = ((BigDecimal) actionContext.getActionContext("money")).doubleValue();
        Account account = accountMapper.getAccountByUserId(userId);
        if (account.getFreezeMoney() >= money) {
            account.setMoney(account.getMoney() + money);
            account.setFreezeMoney(account.getFreezeMoney() - money);
            Integer i = accountMapper.updateAccount(account);
            logger.info("{} 账户释放冻结金额 {} 元", userId, money);
            return i == 1;
        }
        logger.info("{} 账户资金已释放",userId);
        //说明prepare中抛出异常,未冻结资金
        return true;
    }
}
- AccountService 里一共有三个方法,在整个两阶段提交中,一阶段执行 prepareDeduct 方法,二阶段执行 commitDeduct 或者 rollbackDeduct 方法。
- 在 prepareDeduct 中,我们主要检查一下账户是否存在,账户余额是否充足,余额充足就将本次消费的金额冻结起来,冻结的逻辑就是给 freezeMoney 字段增加本次消费金额,从 money 字段减少本次消费金额。
- 等到其他几个服务的一阶段方法都执行完成后,都没有抛出异常,此时就执行二阶段的提交方法,对应这里就是 commitDeduct 方法;如果其他服务的一阶段执行过程中,抛出了异常,那么就执行二阶段的回滚方法,对应这里的 rollbackDeduct。
- 在 commitDeduct 方法中,首先从 BusinessActionContext 中提取出来我们需要的参数(因为这个方法是系统自动调用的,不是我们手动调用,因此没法自己传参数进来,只能通过 BusinessActionContext 来获取),然后再检查一下余额是否充足,没问题就把冻结的资金划掉,就算扣款完成了。
- 在 rollbackDeduct 方法中,也是先从 BusinessActionContext 中获取相应的参数,检查一下冻结的金额,没问题就把冻结的金额恢复到 money 字段上(如果没进入 if 分支,则说明 prepare 中抛出异常,未冻结资金)。
好了,这就是从账户扣钱的两阶段操作,数据库操作比较简单,我这里就不列出来了,文末可以下载源码。
6. Order
再来看订单服务。
由于我们是在 order 中调用 account 完成账户扣款的,所以需要先在 order 中加入 account 的 OpenFeign 调用,如下:
@FeignClient("account")
public interface AccountServiceApiImpl extends AccountServiceApi {
}
这应该没啥好解释的。
接下来我们来看 OrderController:
@RestController
public class OrderController implements OrderServiceApi {

    @Autowired
    OrderService orderService;

    @Override
    public boolean prepare(BusinessActionContext actionContext, String userId, String productId, Integer count) {
        return orderService.prepareCreateOrder(actionContext,userId, productId, count);
    }

    @Override
    public boolean commit(BusinessActionContext actionContext) {
        return orderService.commitOrder(actionContext);
    }

    @Override
    public boolean rollback(BusinessActionContext actionContext) {
        return orderService.rollbackOrder(actionContext);
    }
}
这个跟 AccountService 也基本一致,实现了 OrderServiceApi 接口,接口地址啥的都定义在 OrderServiceApi 中,这个类重点还是在 OrderService 中,如下:
@Service
public class OrderService {

    private static final Logger logger = LoggerFactory.getLogger(OrderService.class);

    @Autowired
    AccountServiceApi accountServiceApi;

    @Autowired
    OrderMapper orderMapper;

    @Transactional(rollbackFor = Exception.class)
    public boolean prepareCreateOrder(BusinessActionContext actionContext, String userId, String productId, Integer count) {
        //先去扣款,假设每个产品100块钱
        boolean resp = accountServiceApi.prepare(actionContext, userId, count * 100.0);
        logger.info("{} 用户购买的 {} 商品共计 {} 件,预下单成功", userId, productId, count);
        return resp;
    }

    @Transactional(rollbackFor = Exception.class)
    public boolean commitOrder(BusinessActionContext actionContext) {
        String userId = (String) actionContext.getActionContext("userId");
        String productId = (String) actionContext.getActionContext("productId");
        Integer count = (Integer) actionContext.getActionContext("count");
        int i = orderMapper.addOrder(userId, productId, count, count * 100.0);
        logger.info("{} 用户购买的 {} 商品共计 {} 件,下单成功", userId, productId, count);
        return i==1;
    }

    @Transactional(rollbackFor = Exception.class)
    public boolean rollbackOrder(BusinessActionContext actionContext) {
        String userId = (String) actionContext.getActionContext("userId");
        String productId = (String) actionContext.getActionContext("productId");
        Integer count = (Integer) actionContext.getActionContext("count");
        logger.info("{} 用户购买的 {} 商品共计 {} 件,订单回滚成功", userId, productId, count);
        return true;
    }
}
跟之前的 AccountService 一样,这里也是三个核心方法:
- prepareCreateOrder:这里主要是调用了一下账户的方法,去检查下看下钱够不。一阶段就做个这事。
- commitOrder:二阶段如果是提交的话,就向数据库中添加一条订单记录。
- rollbackOrder:二阶段如果是回滚的话,就什么事情都不做,打个日志就行了。
好了,这就是下单的操作。
7. Storage
最后我们再来看看扣库存的操作,这个跟扣款比较像,一起来看下:
@RestController
public class StorageController implements StorageServiceApi {

    @Autowired
    StorageService storageService;

    @Override
    public boolean deduct(BusinessActionContext actionContext, String productId, Integer count) {
        return storageService.prepareDeduct(productId, count);
    }

    @Override
    public boolean commit(BusinessActionContext actionContext) {
        return storageService.commitDeduct(actionContext);
    }

    @Override
    public boolean rollback(BusinessActionContext actionContext) {
        return storageService.rollbackDeduct(actionContext);
    }
}
核心逻辑在 StorageService 中,如下:
@Service
public class StorageService {

    private static final Logger logger = LoggerFactory.getLogger(StorageService.class);

    @Autowired
    StorageMapper storageMapper;

    /**
     * 预扣库存
     *
     * @param productId
     * @param count
     * @return
     */
    @Transactional(rollbackFor = Exception.class)
    public boolean prepareDeduct(String productId, Integer count) {
        Storage storage = storageMapper.getStorageByProductId(productId);
        if (storage == null) {
            throw new RuntimeException("商品不存在");
        }
        if (storage.getCount() < count) {
            throw new RuntimeException("库存不足,预扣库存失败");
        }
        storage.setFreezeCount(storage.getFreezeCount() + count);
        storage.setCount(storage.getCount() - count);
        int i = storageMapper.updateStorage(storage);
        logger.info("{} 商品库存冻结 {} 个", productId, count);
        return i == 1;
    }

    /**
     * 扣库存
     *
     * @param actionContext
     * @return
     */
    @Transactional(rollbackFor = Exception.class)
    public boolean commitDeduct(BusinessActionContext actionContext) {
        String productId = (String) actionContext.getActionContext("productId");
        Integer count = (Integer) actionContext.getActionContext("count");
        Storage storage = storageMapper.getStorageByProductId(productId);
        if (storage.getFreezeCount() < count) {
            throw new RuntimeException("库存不足,扣库存失败");
        }
        storage.setFreezeCount(storage.getFreezeCount() - count);
        int i = storageMapper.updateStorage(storage);
        logger.info("{} 商品库存扣除 {} 个", productId, count);
        return i == 1;
    }

    @Transactional(rollbackFor = Exception.class)
    public boolean rollbackDeduct(BusinessActionContext actionContext) {
        String productId = (String) actionContext.getActionContext("productId");
        Integer count = (Integer) actionContext.getActionContext("count");
        Storage storage = storageMapper.getStorageByProductId(productId);
        if (storage.getFreezeCount() >= count) {
            storage.setFreezeCount(storage.getFreezeCount() - count);
            storage.setCount(storage.getCount() + count);
            int i = storageMapper.updateStorage(storage);
            logger.info("{} 商品释放库存 {} 个", productId, count);
            return i == 1;
        }
        //说明 prepare 阶段就没有冻结
        return true;
    }
}
这个跟 AccountService 的逻辑基本上是一样的,我就不多做解释了。
8. Business
最后再来看看调用的入口 Business。Business 中要调用 storage 和 order,所以先把这两个的 OpenFeign 整进来:
@FeignClient("order")
public interface OrderServiceApiImpl extends OrderServiceApi {
}
@FeignClient("storage")
public interface StorageServiceApiImpl extends StorageServiceApi {
}
然后看下接口调用:
@RestController
public class BusinessController {
    @Autowired
    BusinessService businessService;

    @PostMapping("/order")
    public RespBean order(String account, String productId, Integer count) {
        try {
            businessService.purchase(account, productId, count);
            return RespBean.ok("下单成功");
        } catch (Exception e) {
            e.printStackTrace();
            return RespBean.error("下单失败", e.getMessage());
        }
    }
}
@Service
public class BusinessService {
    @Autowired
    StorageServiceApi storageServiceApi;
    @Autowired
    OrderServiceApi orderServiceApi;

    @GlobalTransactional
    public void purchase(String account, String productId, Integer count) {
        String xid = RootContext.getXID();
        BusinessActionContext actionContext = new BusinessActionContext();
        actionContext.setXid(xid);
        storageServiceApi.deduct(actionContext, productId, count);
        orderServiceApi.prepare(actionContext, account, productId, count);
    }
}
BusinessService 中通过 RootContext 获取全局事务 ID,然后构造一个 BusinessActionContext 对象,开始整个流程的调用。
好啦,大功告成。
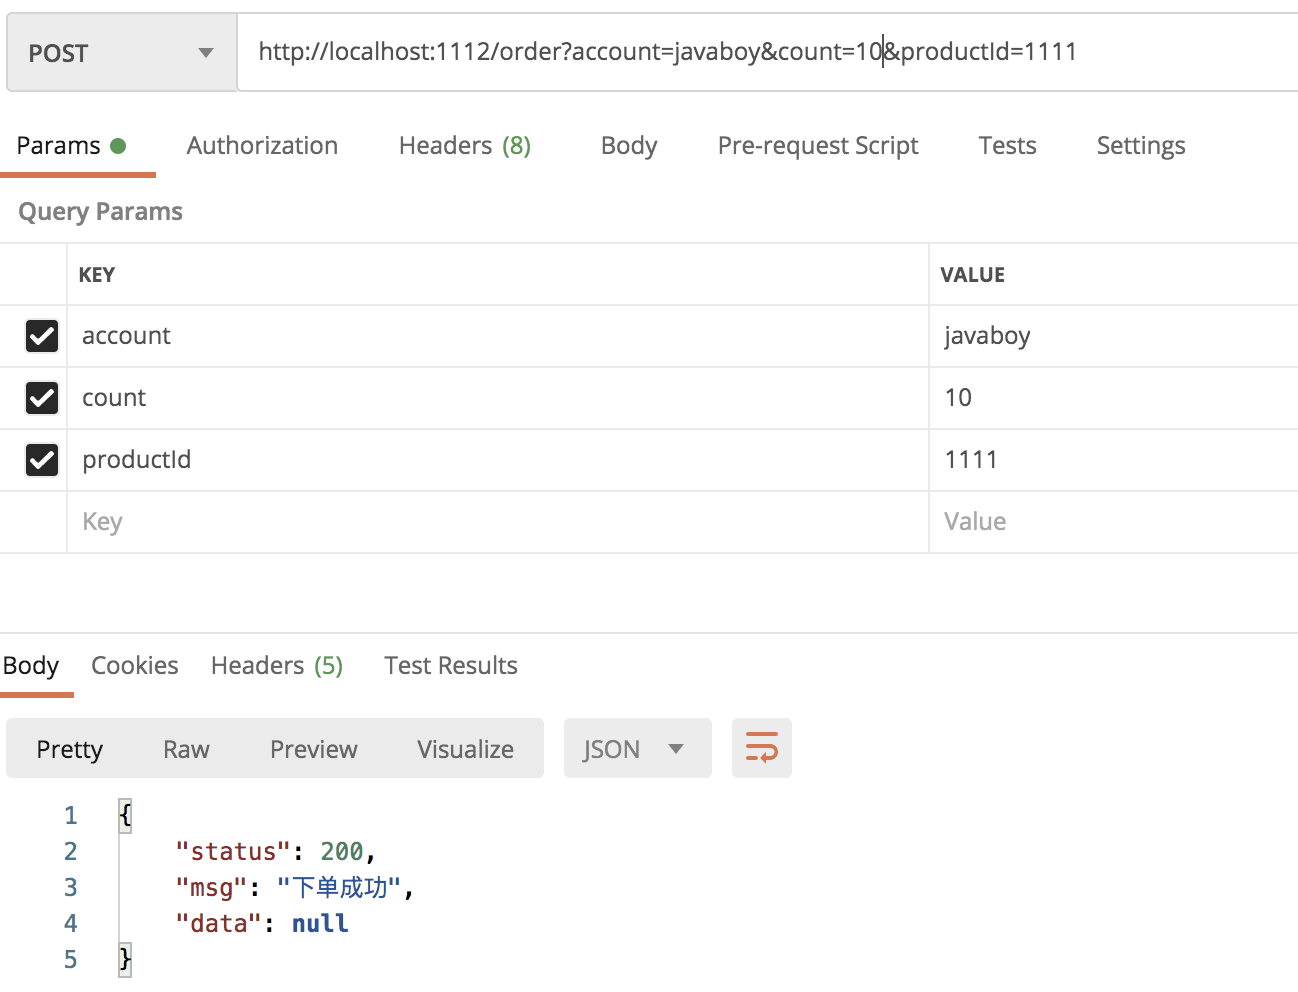
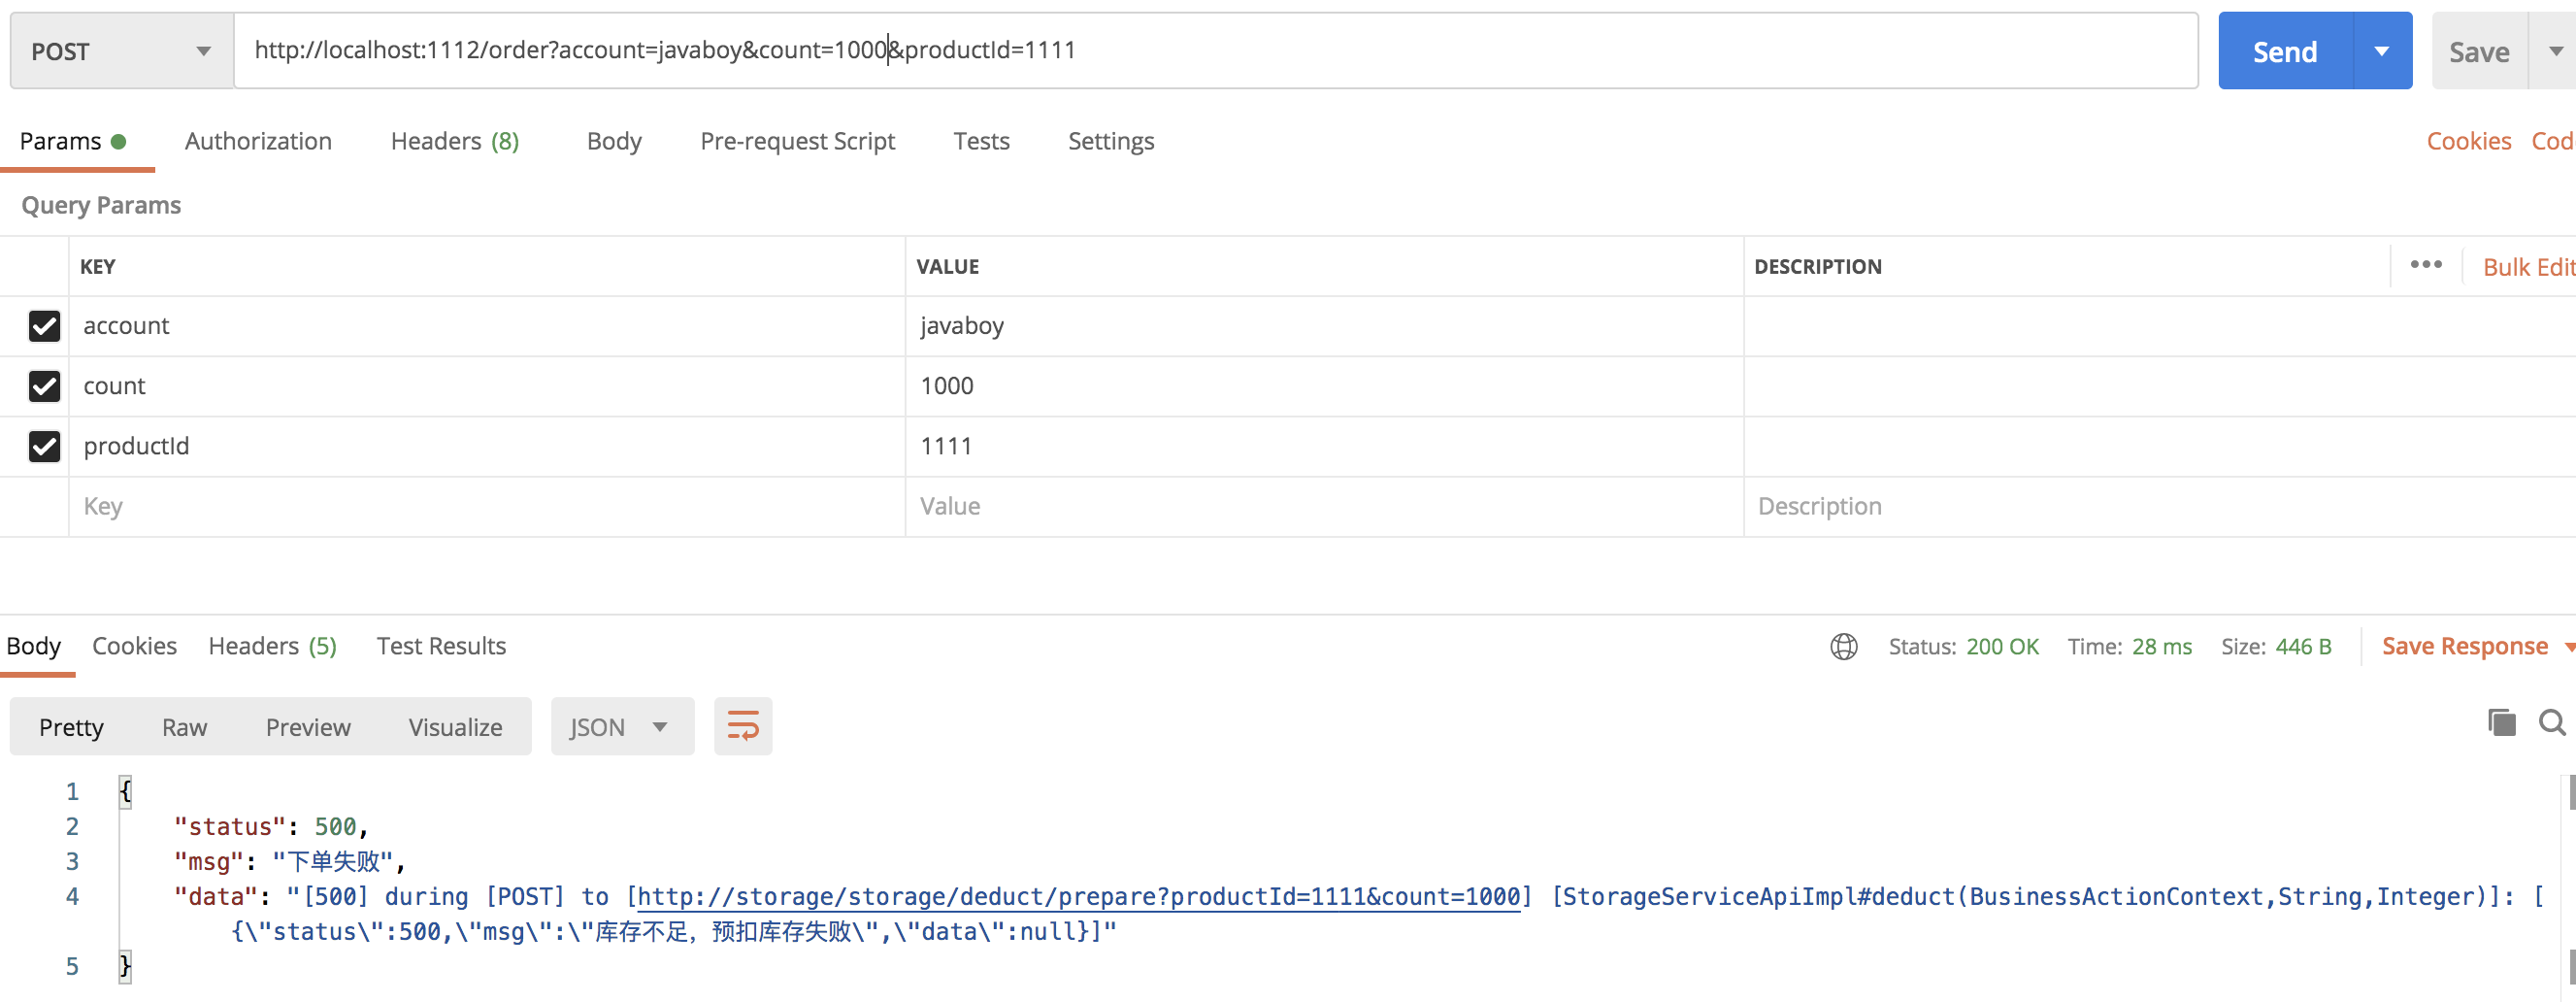
9. 测试
最后再来个简单测试,成功的测试:
调用失败的测试:
好啦,这篇文章太长了,我就不啰嗦了,本文需要结合上篇文章一起食用效果更佳~
|


- 上一条: DevOps需要NetDevOps的5大理由 2022-06-07
- 下一条: 云原生爱好者周刊:使用 GitOps 来动态管理 Grafana 的数据源 2022-06-07
- 听说,99% 的 Go 程序员都被 defer 坑过 2021-10-19
- 支持事务,还是不支持事务?这是一个问题 2021-11-09
- 分布式事务,原理简单,写起来全是坑! 2022-06-20
- XA 事务水很深,小伙子我怕你把握不住! 2021-08-24
- 教你3种Kafka的指定副本作为Leader的实现方式 2022-03-04